How To Create A Bucket
A Bucket is your private cloud storage container where datasets, models, and artifacts will be hosted.
Security Highlight: LUML does not store your data on its servers and does not act as an intermediary in data transfer. The platform's architecture is designed so that interaction occurs directly between your browser (Client-side) and the cloud storage. This ensures that your files never pass through the platform's backend, guaranteeing maximum confidentiality.
To enable this direct connection, your provider must be S3-compatible and have correctly configured access policies.
General Instruction
Regardless of the chosen provider (Amazon S3, Google Cloud, Azure, Wasabi, DigitalOcean), the setup process follows these steps:
- Create an account with a cloud provider.
- Create a Bucket.
- Configure CORS (to allow the browser to upload files directly).
- Generate an Access Key and Secret Key.
- Connect the bucket to LUML by specifying the region and endpoint.
Key Concepts
Storage Classes
When creating a bucket, you must choose a storage class. This affects cost and speed:
- Standard / Hot: Best for LUML. Fast access, no early deletion fees, though storage cost is higher. Choose this for active work.
- Archive / Cold: Cheaper storage but slow access and expensive retrieval. Not recommended for active models.
CORS (Cross-Origin Resource Sharing)
This setting is critical precisely because of LUML's client-side architecture. Since the file upload is initiated by your browser (located on the platform's domain) and the recipient is the cloud bucket (a different domain), the browser will block such requests without explicit permission. Configuring CORS "tells" the bucket that it is allowed to accept direct requests (PUT, POST) from the platform's web interface.
Typical JSON for S3-compatible systems:
[
    {
        "AllowedHeaders": ["*"],
        "AllowedMethods": ["GET", "POST", "PUT", "DELETE", "HEAD"],
        "AllowedOrigins": ["*"],
        "ExposeHeaders": ["Content-Range"],
        "MaxAgeSeconds": 3000
    }
]
Guide for Amazon AWS (S3)
Amazon S3 is the standard. If you are a beginner, we recommend starting here.
Create a Bucket
- Go to the AWS Console and find the S3 service.
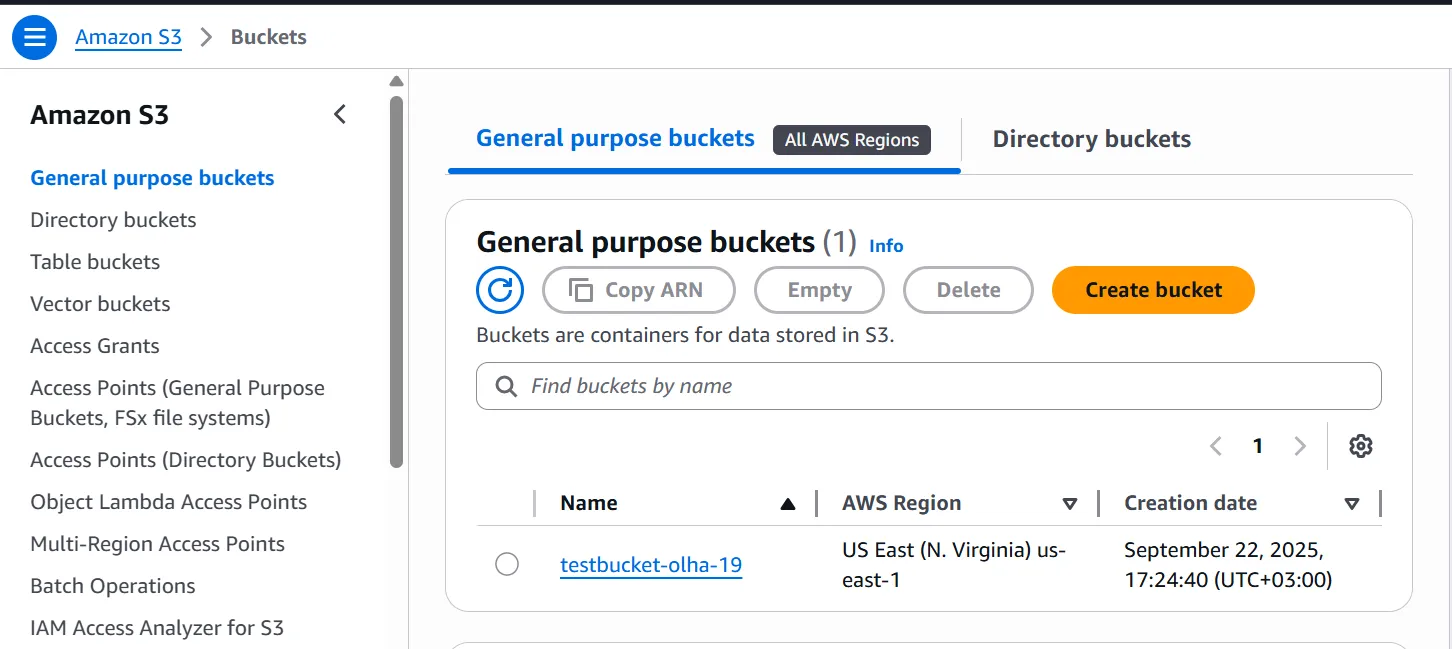
- Click Create bucket.
- Enter a unique name and select a Region (remember this, you will need it for LUML).
- Other settings (Block Public Access) can be left as default, as LUML uses signed URLs for access.
Configure CORS
- Click on the name of the created bucket.
- Go to the Permissions tab.

- Scroll down to the Cross-origin resource sharing (CORS) section.
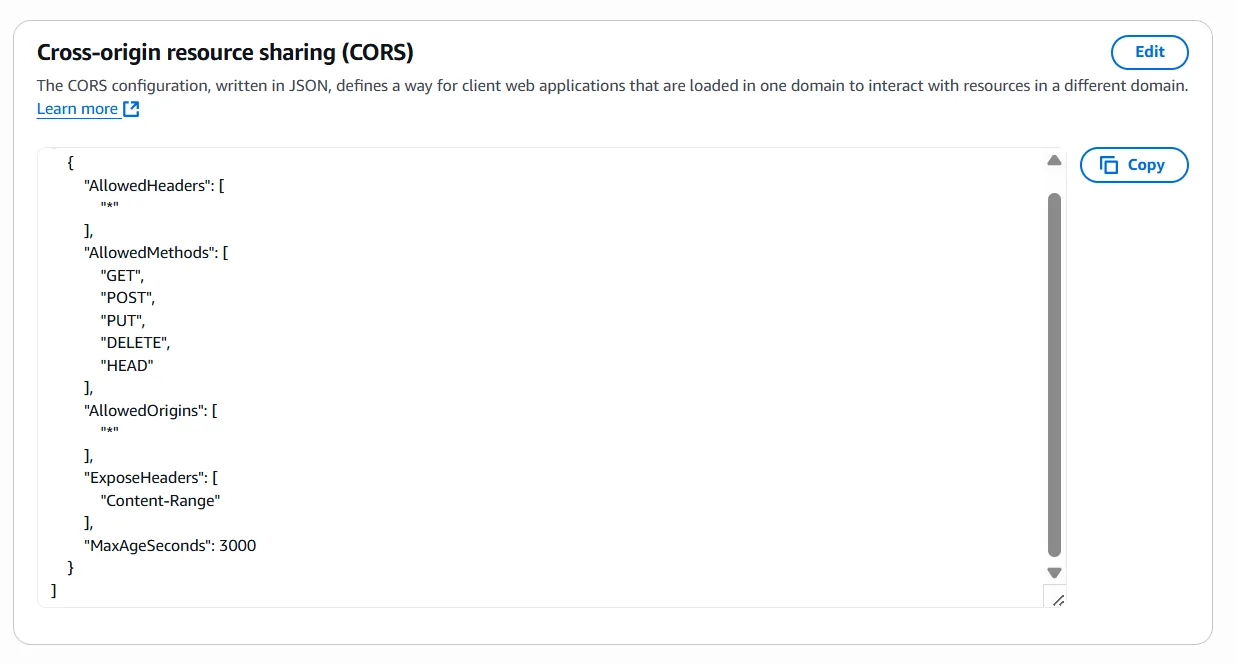
- Click Edit and paste the JSON code (see "Key Concepts" above).
- Click Save changes.
Get Keys
- In the top right corner, click on your account name → Security credentials.
- Find the Access keys section.
- Click Create access key.
- Copy the Access Key and Secret Access Key.
Important: The Secret Key is shown only once! Save it securely.
Guide for Google Cloud Storage (GCS)
Google Cloud has specific requirements. It is not natively S3-compatible, so it requires enabling "Interoperability" mode.
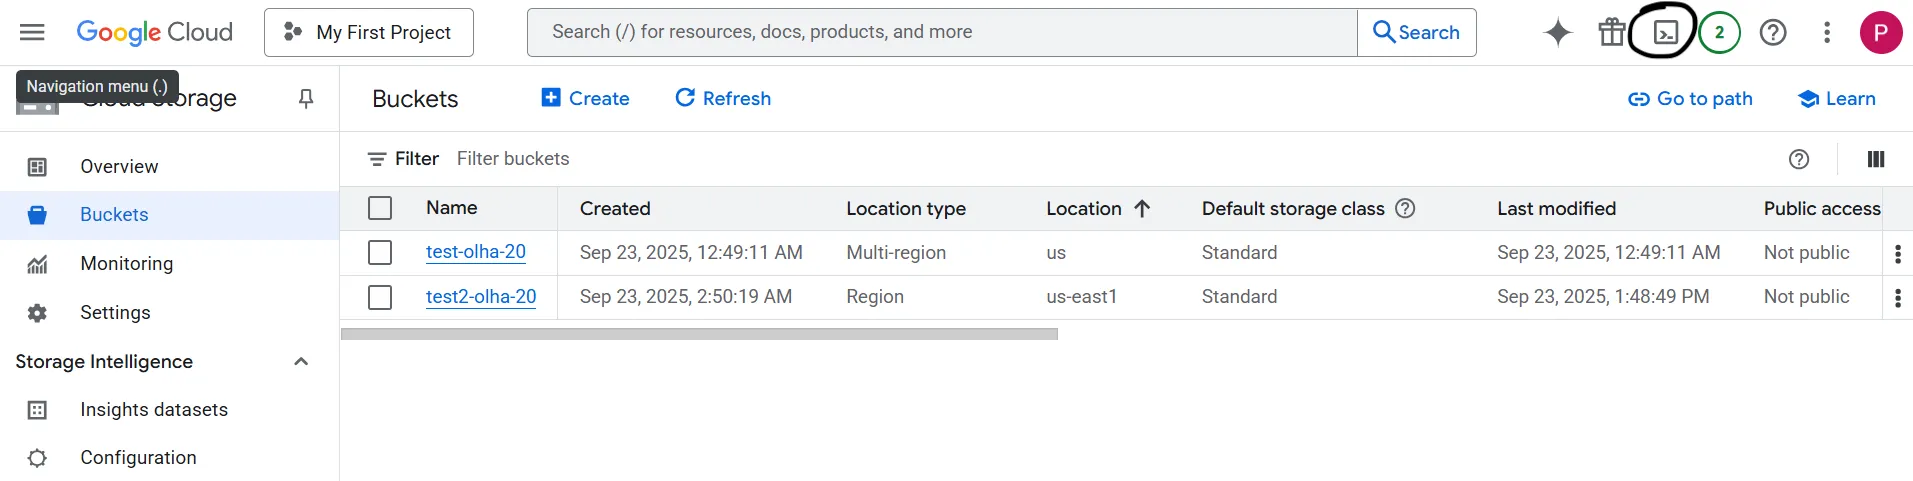
Create a Bucket
- In the Google Cloud Console, go to Cloud Storage → Buckets.
- Click Create.
- Set a name, select a Region, and choose the Standard class.
- Click Create.
Configure CORS (via Terminal)
Google Cloud lacks a simple visual CORS editor, so we will use the built-in console.
- Activate Cloud Shell (terminal icon in the top right corner).
And here is the terminal:
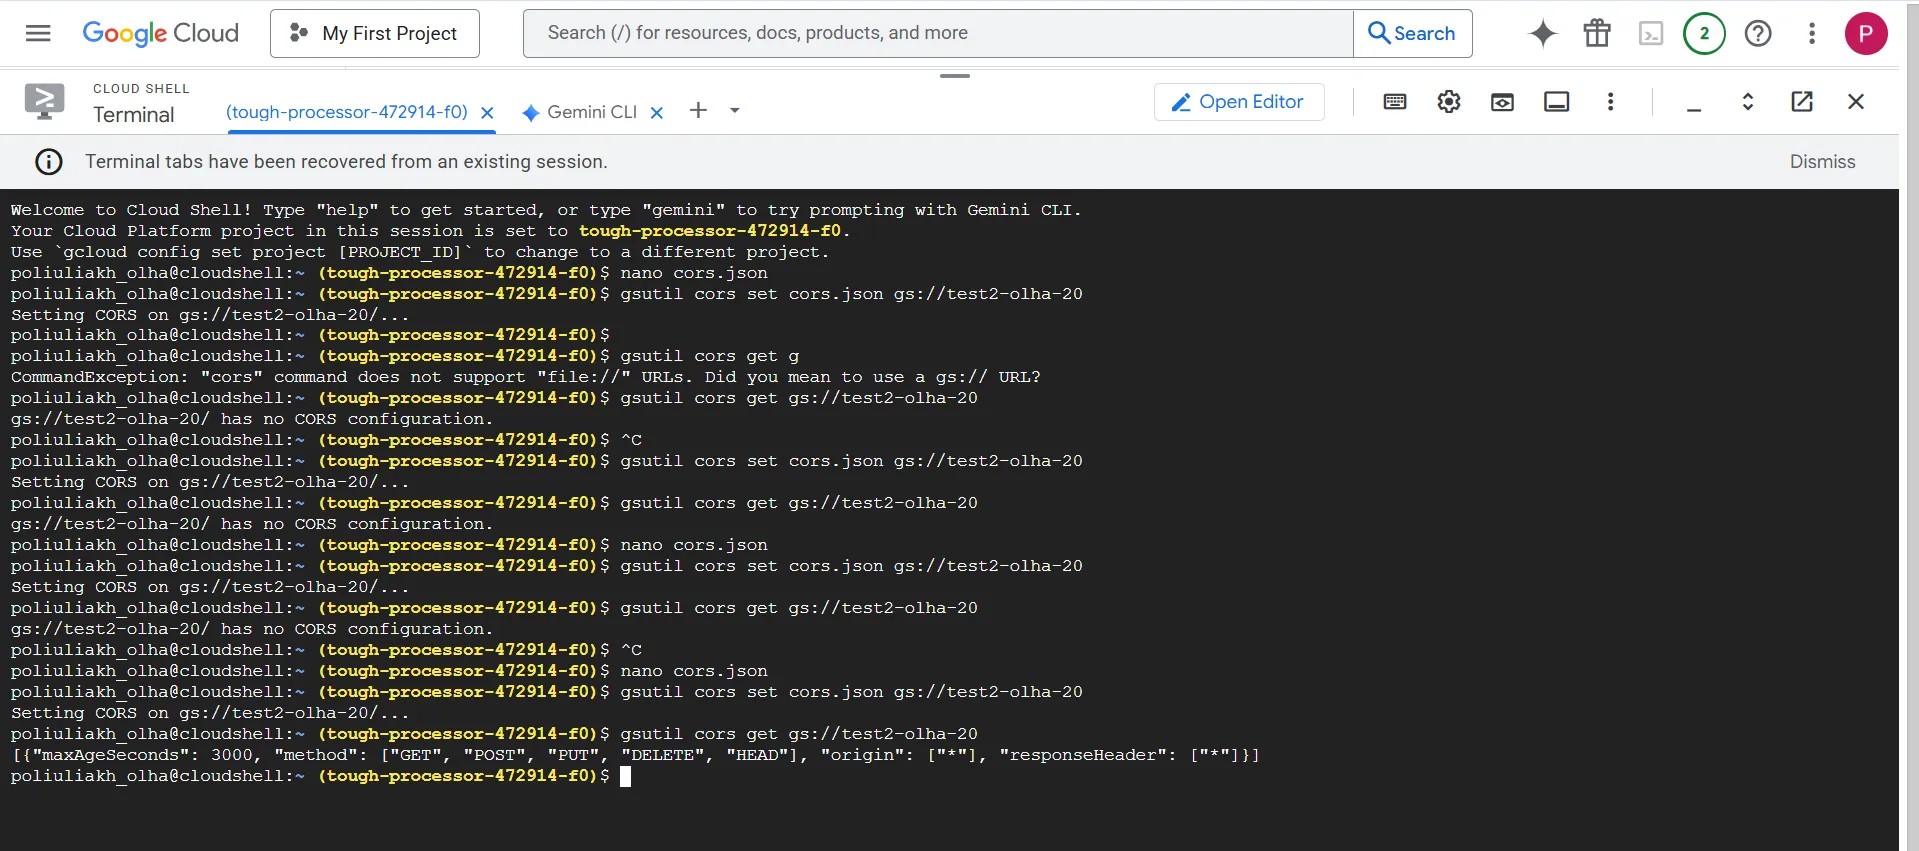
- Create a configuration file using the command: nano cors.json
- Paste the following text into the editor:
[
  {
    "origin": ["*"],
    "method": ["GET", "POST", "PUT", "DELETE", "HEAD"],
    "responseHeader": ["*"],
    "maxAgeSeconds": 3000
  }
]
- Save the file: press Ctrl+O, then Enter, then Ctrl+X to exit.
- Apply settings to your bucket with the command:
gsutil cors set cors.json gs://YOUR_BUCKET_NAME
- Verify success with:
gsutil cors get gs://YOUR_BUCKET_NAME
Get Keys (Interoperability)
- Go to Cloud Storage → Settings.
- Open the Interoperability tab.
- Click Create a key for a service account (or User account).
- Copy the generated Access Key and Secret.
Connecting to LUML
The final step is adding the configured bucket to the platform.
- In LUML, go to Settings → Buckets.
- Click Add new bucket.
- Fill in the fields:
-
Bucket Name - The name you gave the bucket during creation.
-
Region - The bucket's region (e.g., us-east-1).
-
Endpoint - The provider's address without https://. For AWS: s3.amazonaws.com (or s3.us-east-1.amazonaws.com). For Google: storage.googleapis.com.
-
Access Key & Secret Key - The keys you obtained earlier.
- Click Save. If everything is configured correctly, your bucket is ready to use.